

Airtable continues to launch new tools for developers to build in and on Airtable. Which means it is time for a new installment of The Complete Developer's Guide to Airtable.
The Complete Developer's Guide to Airtable (3 Part Series)
- Read Part 1: Scripts, App SDK, REST API, Sequin →
- Read Part 2: Webhooks 👇
- Read Part 3: Interfaces →
In this part 2 of the Complete Developer's Guide to Airtable, we'll cover how to use Airtable's incoming webhooks for automations.
What are webhooks
Webhooks are messages an application can send when a specific event occurs. Messages are most often HTTP requests. They are a common method for integrating applications and services.
In the absence of webhooks, to know if an event has occurred in another application, you need to constantly poll the other application for an update. Think of a small child incessantly asking "are we there yet?" on a road trip.
Webhooks, by contrast, are a more elegant solution. When an event happens in another application - for example, a new contact is created in Salesforce - an HTTP request will be sent to your app describing the event and its details. Then, your app needs an always-on endpoint for receiving these webhook requests and taking the proper action (easier said than done).
With Airtable's new support for incoming webhooks, you get an always-on webhook endpoint that is ready to receive events from internal or third-party services. You can then send webhooks to Airtable to trigger automations that take the inputs of the webhook to manipulate your Airtable base or trigger other actions like emails and more.
With webhooks, you no longer need to set up a scheduled automation to poll a service for updates every couple of minutes. This makes integrating Airtable into your stack much nicer.
Who gets Airtable webhooks
Webhooks are included on all Airtable plans as a part of the Automations feature:
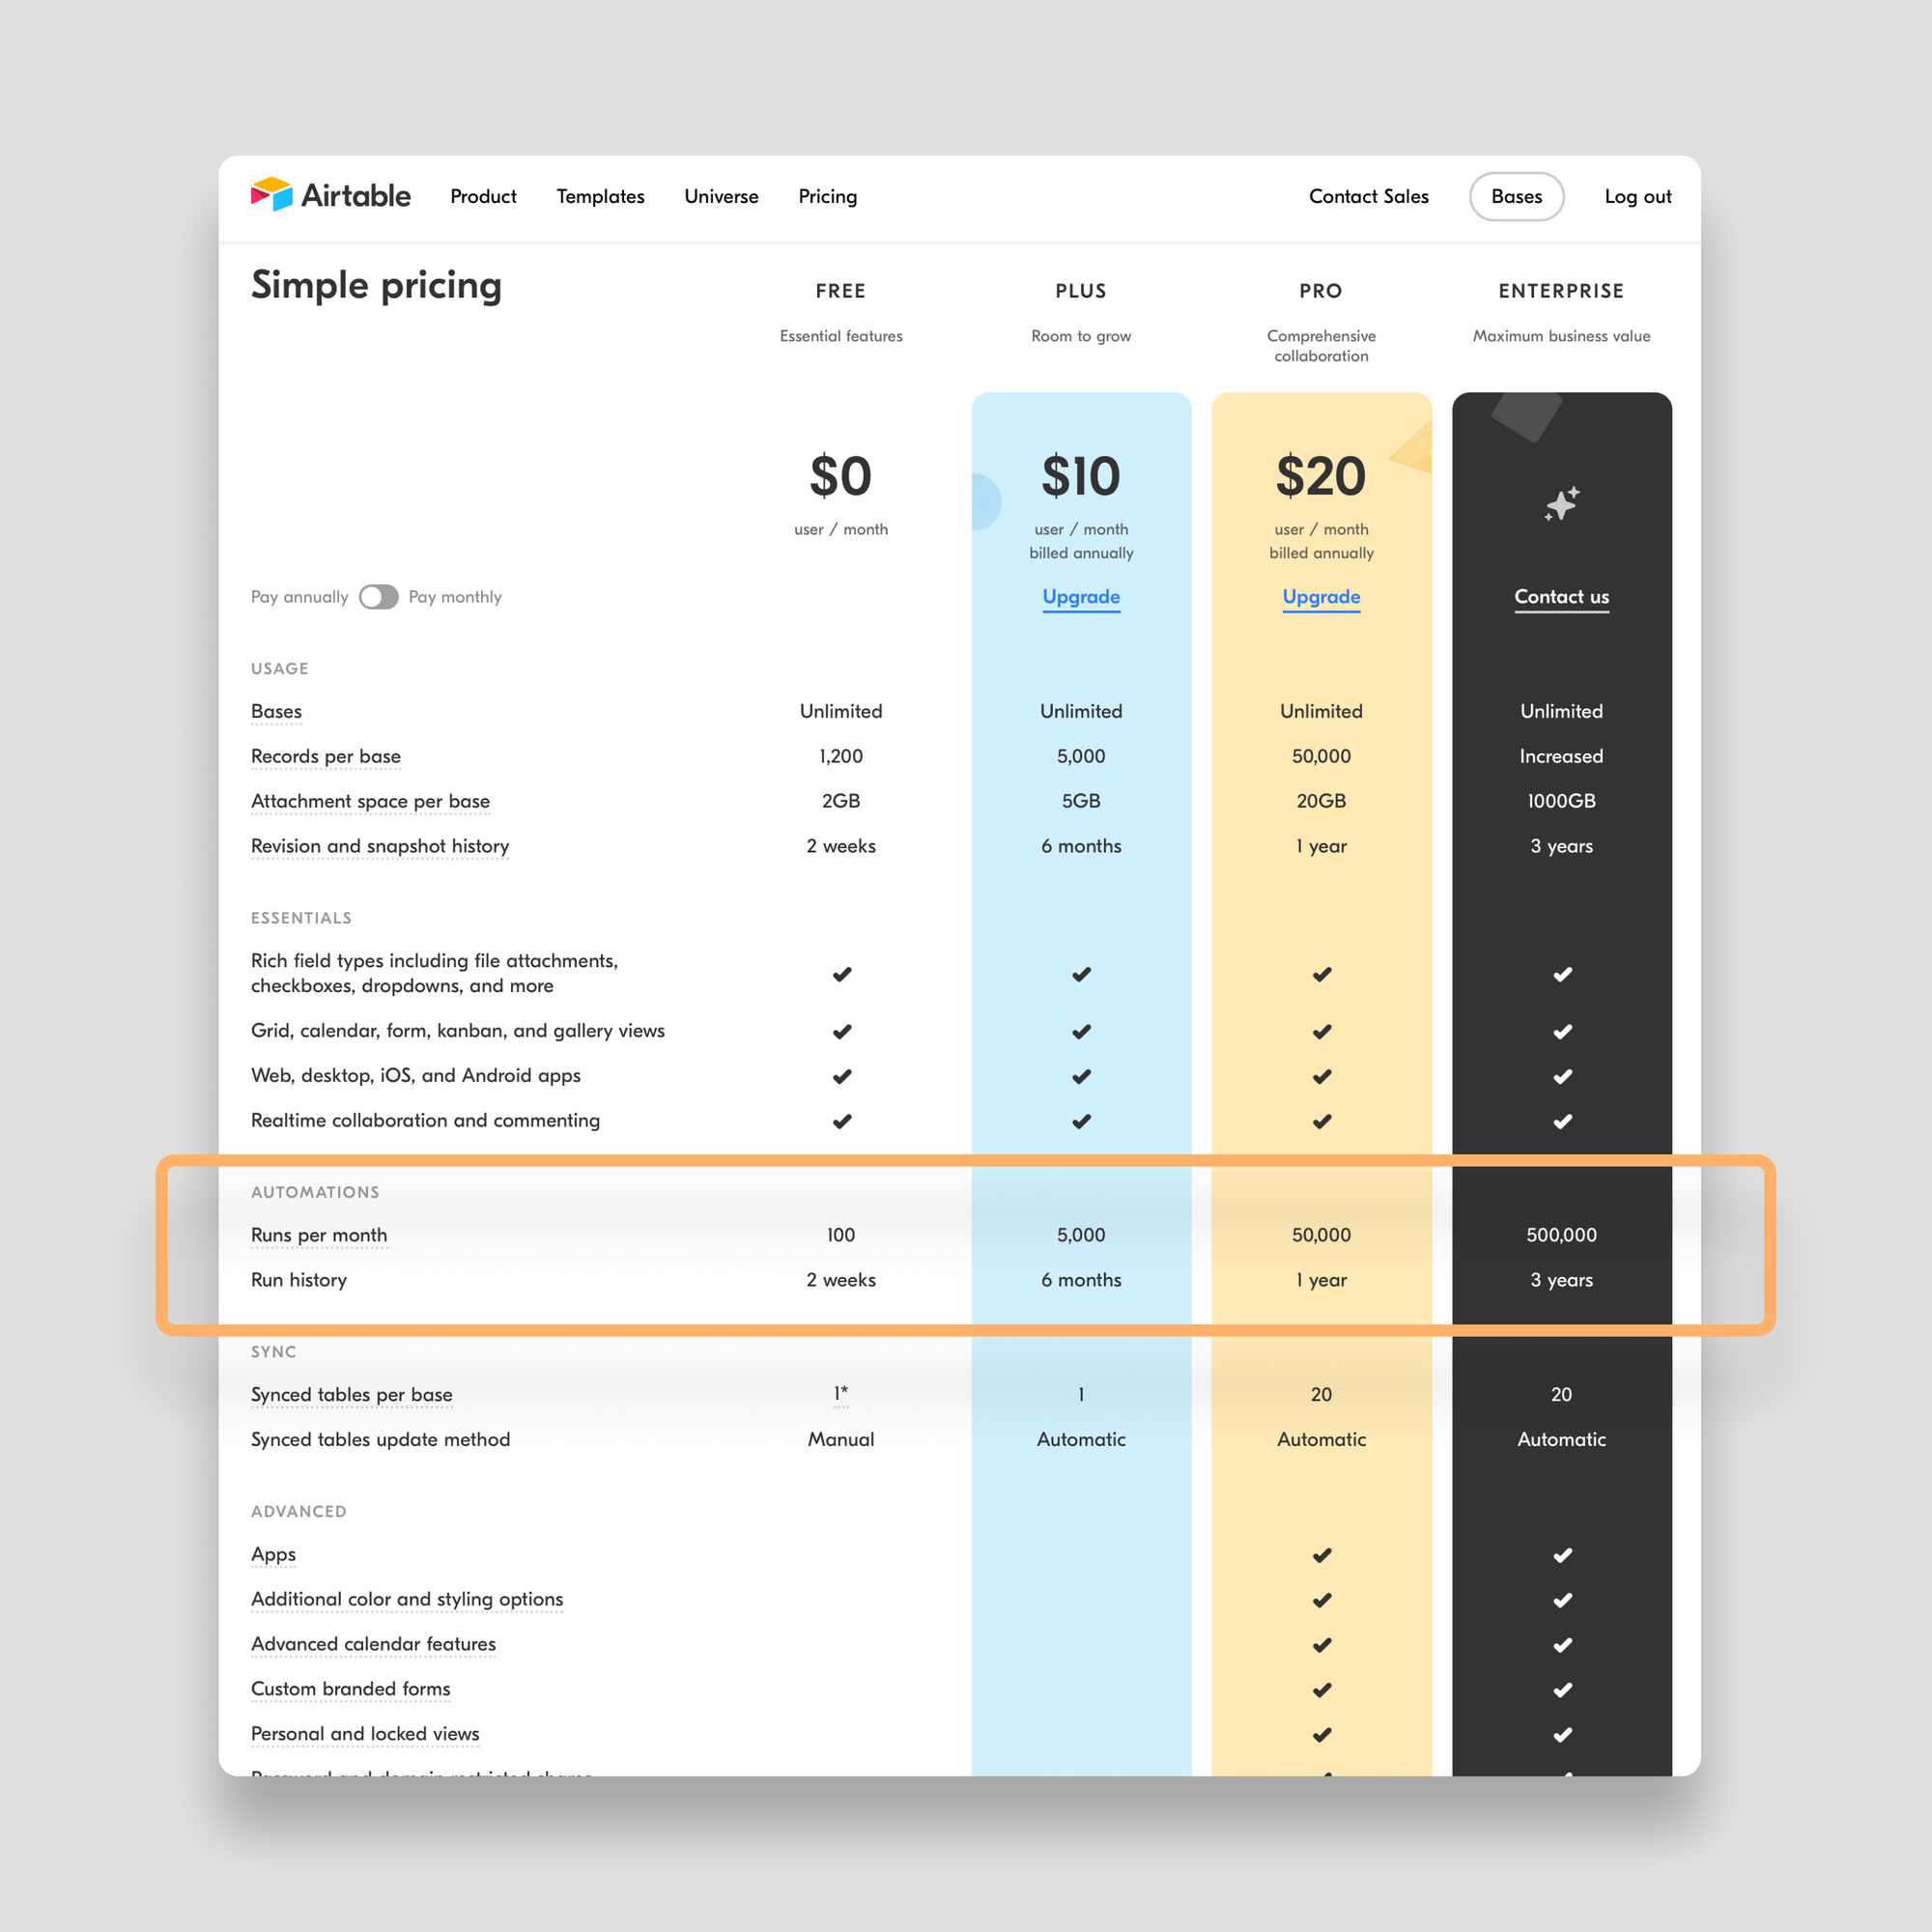
Keep in mind, that webhooks can happen frequently. For example, if you trigger a webhook every time a new contact is created in Salesforce, this might happen several times each day. So you can burn through the 100 automations allotted on the free tier in a number of days.
Beyond the total number of Webhooks, there are a couple of other limitations developers should consider with Airtable webhooks:
- Airtable caps webhook payloads to 100kb right now.
- Airtable only works with
JSON. NoXMLorurlencodedwebhooks for now.
Note: Thank you to Bill French, kuovonne and ScottWorld for investigating these limits in the Airtable community.
Building a webhook automation
To give you a practical example of how Airtable automations work with webhooks, let's build one using a Stripe webhook.
The scenario
Let's say your accounting team wants to use Airtable to help manage customer subscription renewals that are processed through Stripe. The team wants to be alerted before any subscription renews so they can verify the details of the subscription.
Luckily, you can have Stripe send an invoice-upcoming webhook several days ahead of a subscription renewing. You can create a new record in an Airtable base with the details of the webhook so the team can create a workflow to manage this process.
A three-step process
As you'll see in Airtable's official webhook help docs, creating an automation that is triggered by a webhook is a three-step process:
- Create the webhook and test it.
- Upon a successful test of the webhook, add an automation action.
- Turn your new automation on.
Create and test your webhook
Starting with a blank Airtable base, click the Automations button and select the Create a custom automation option:

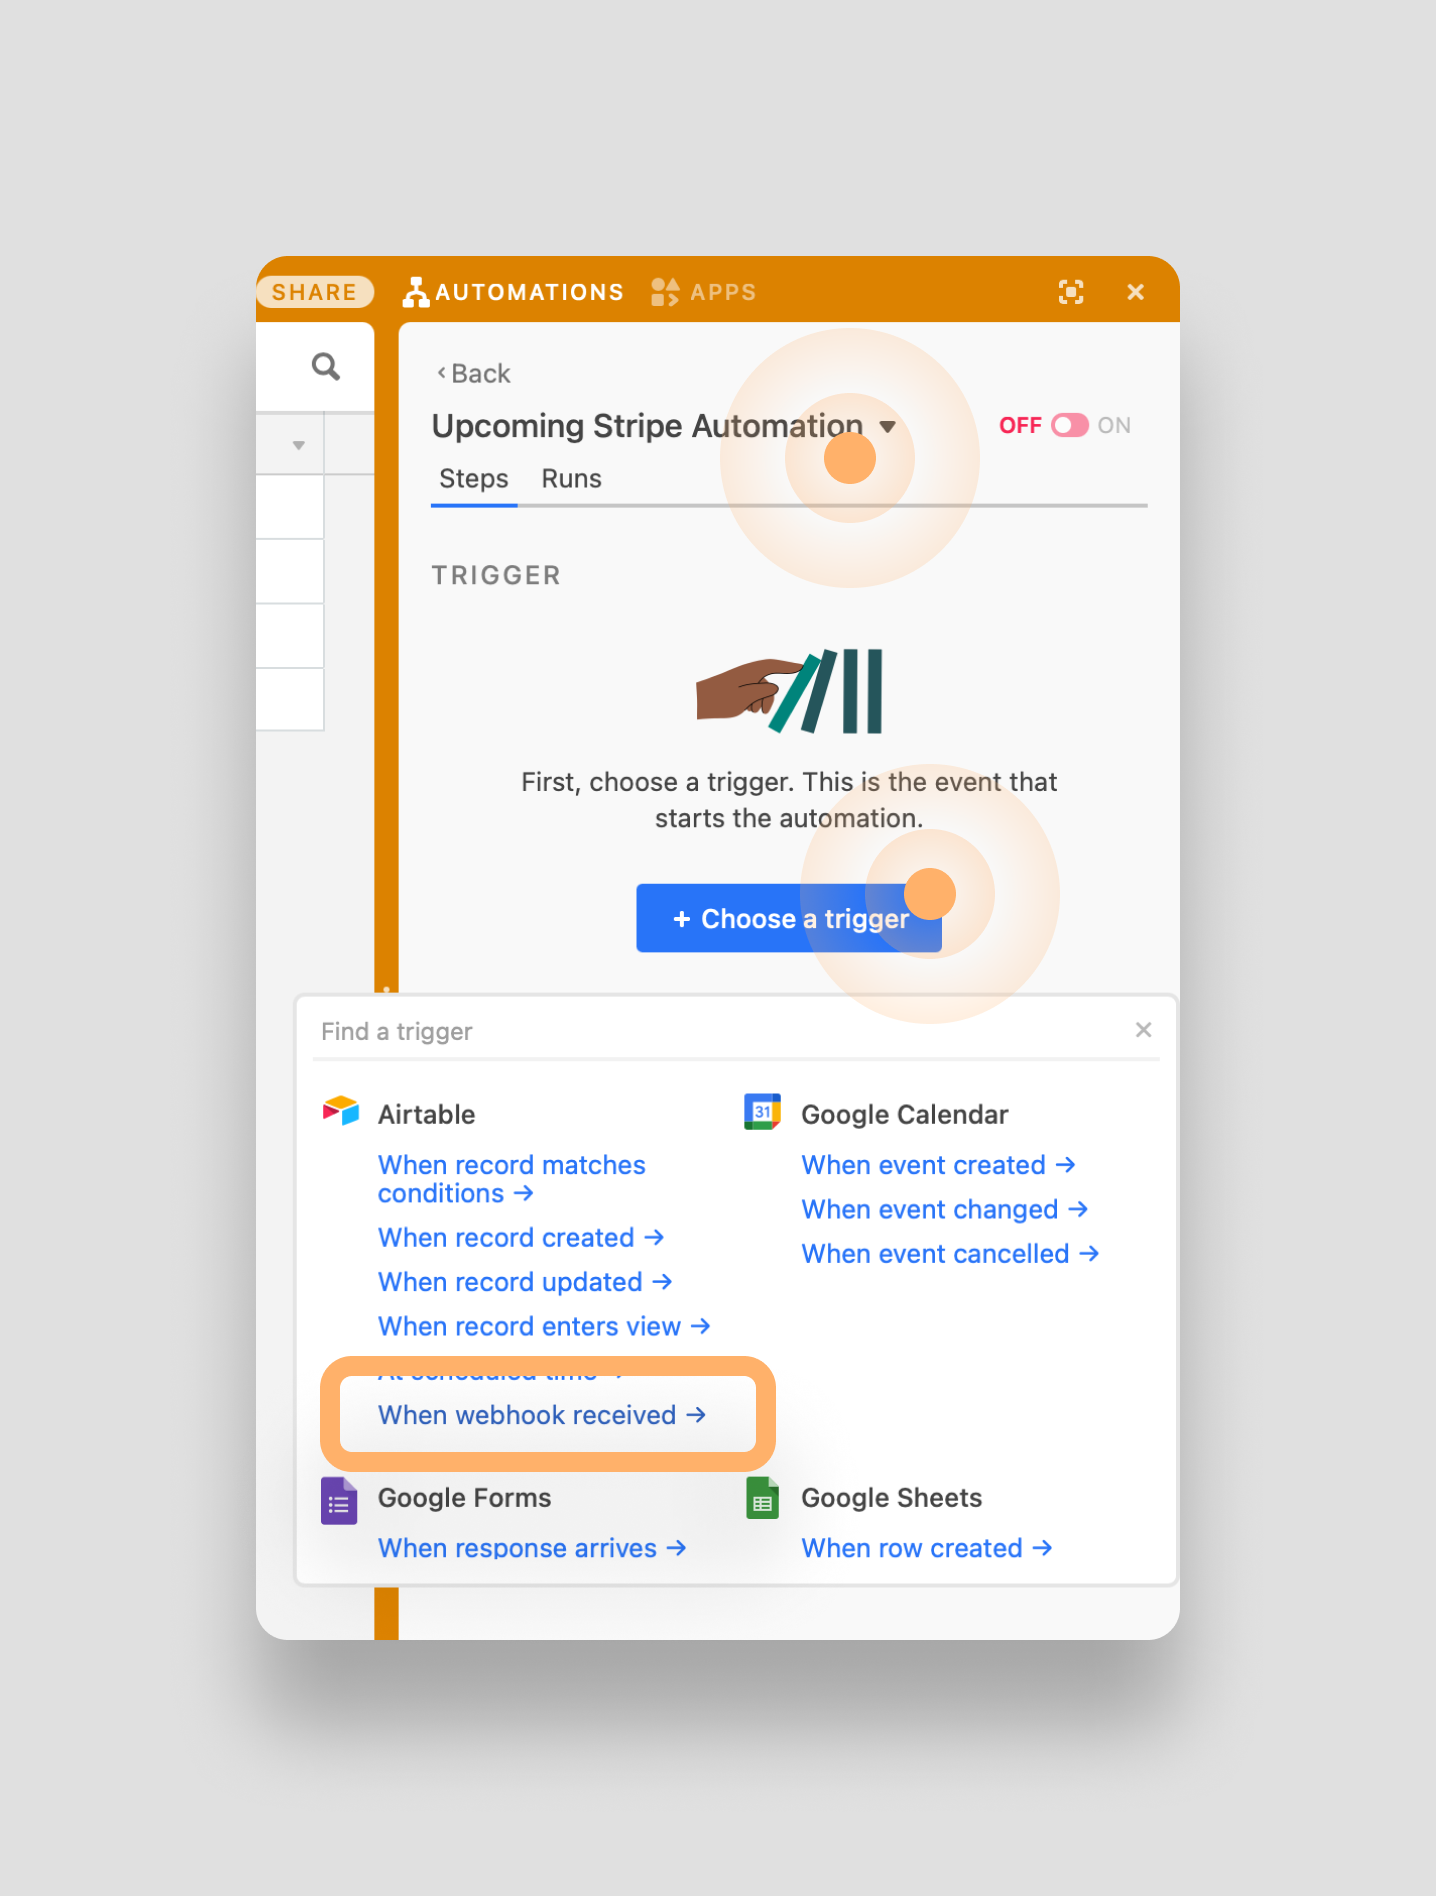
Name your new automation something along the lines of Upcoming Stripe Invoice. Then click the blue Choose a trigger button and select When webhook received:
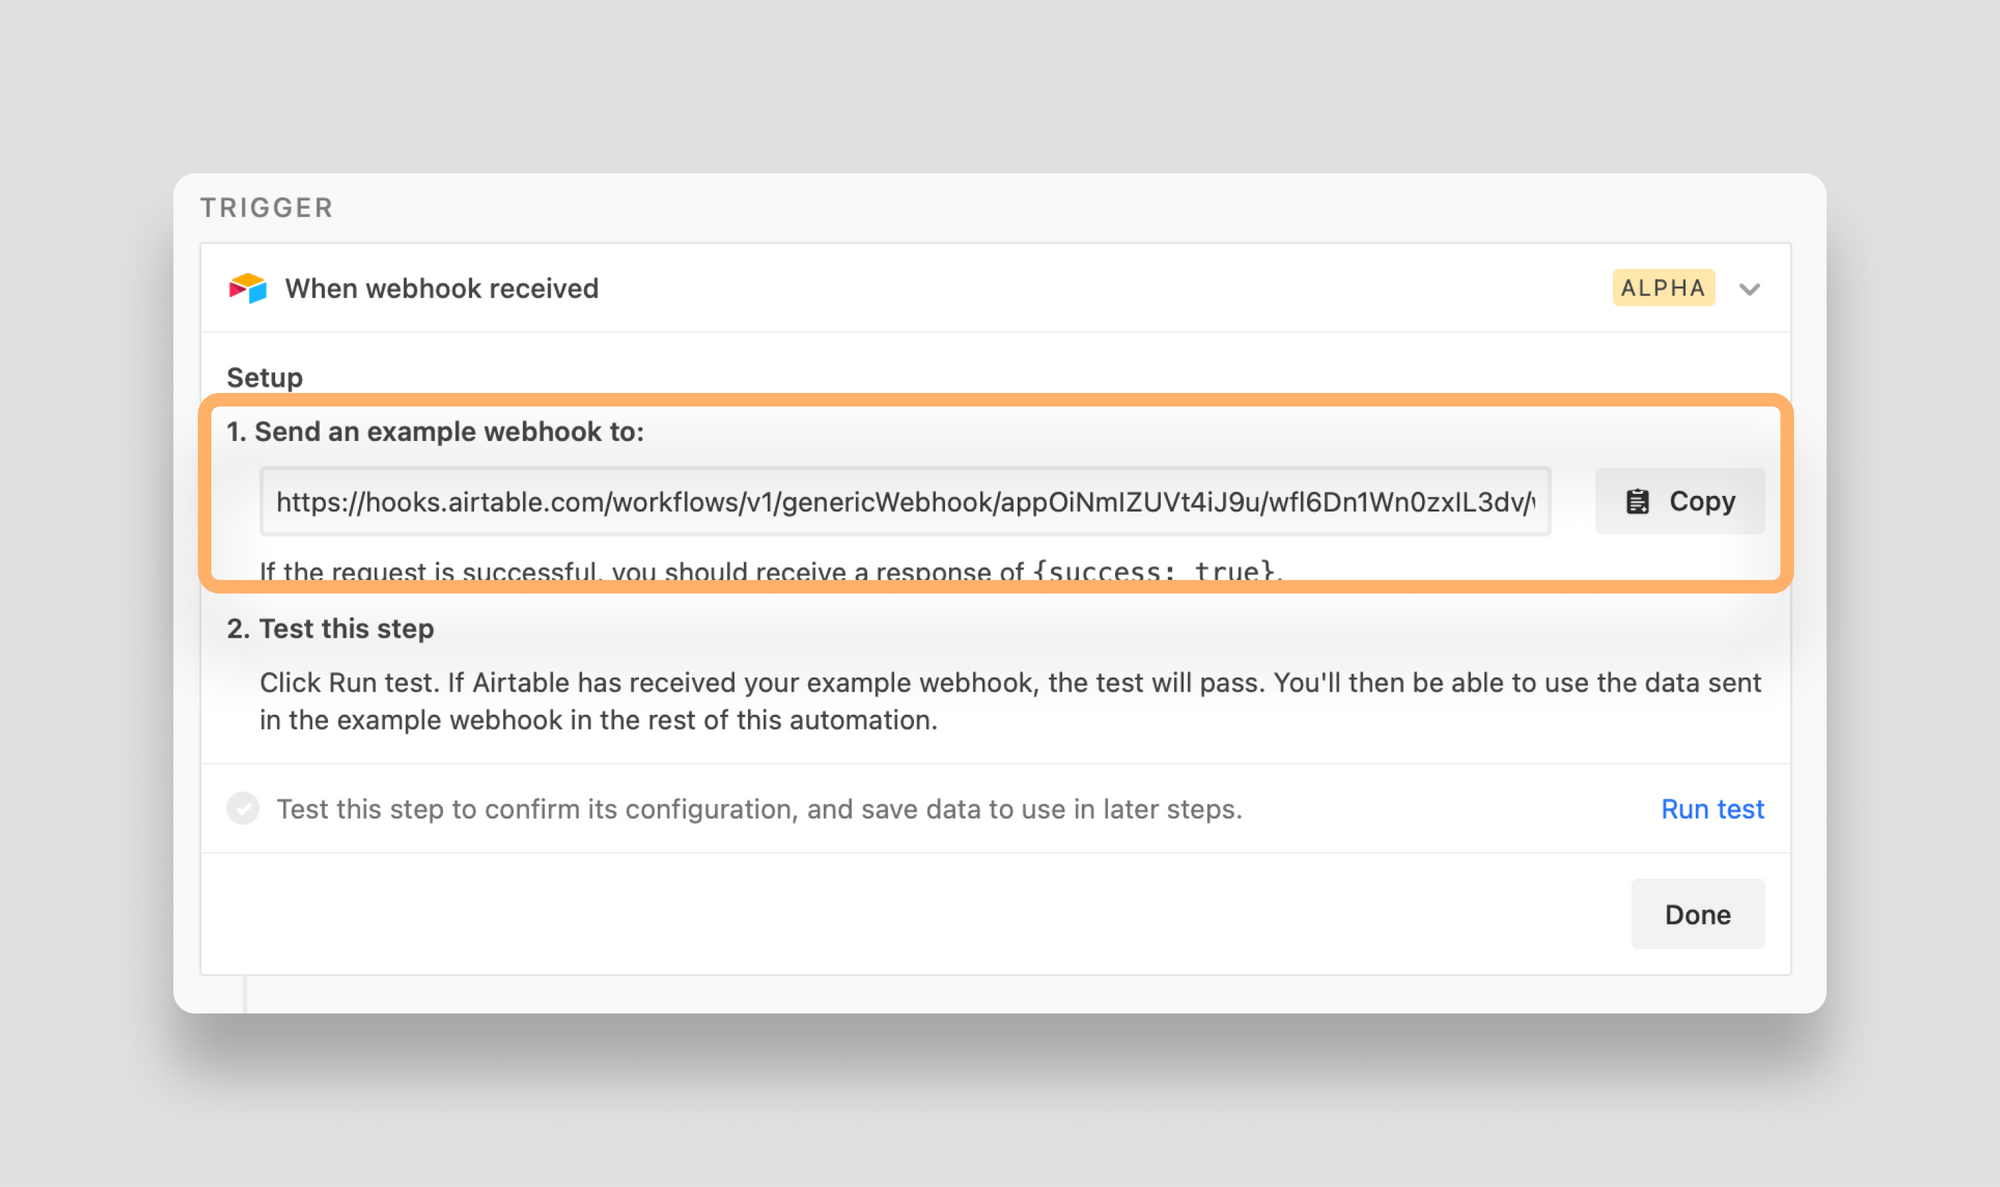
Airtable will now generate the URL where you want Stripe to post the webhook. Copy this URL:
Now that Airtable is ready to receive a webhook, head over to Stripe to configure a new outbound webhook.
Note: for this tutorial we're using Stripe, but all sorts of platforms - from Salesforce, to Jira, to Shopify - use webhooks. Just check their developer docs.
After you log in to your Stripe account, flip the switch to View test data (so you can test your webhooks). Then click the Developers option, select Webhooks and click to Add endpoint:

In the Add a webhook endpoint modal that appears, paste in the URL you copied from Airtable. Then add a description and under the Events to send section select invoice.upcoming. Finally, click Add endpoint:

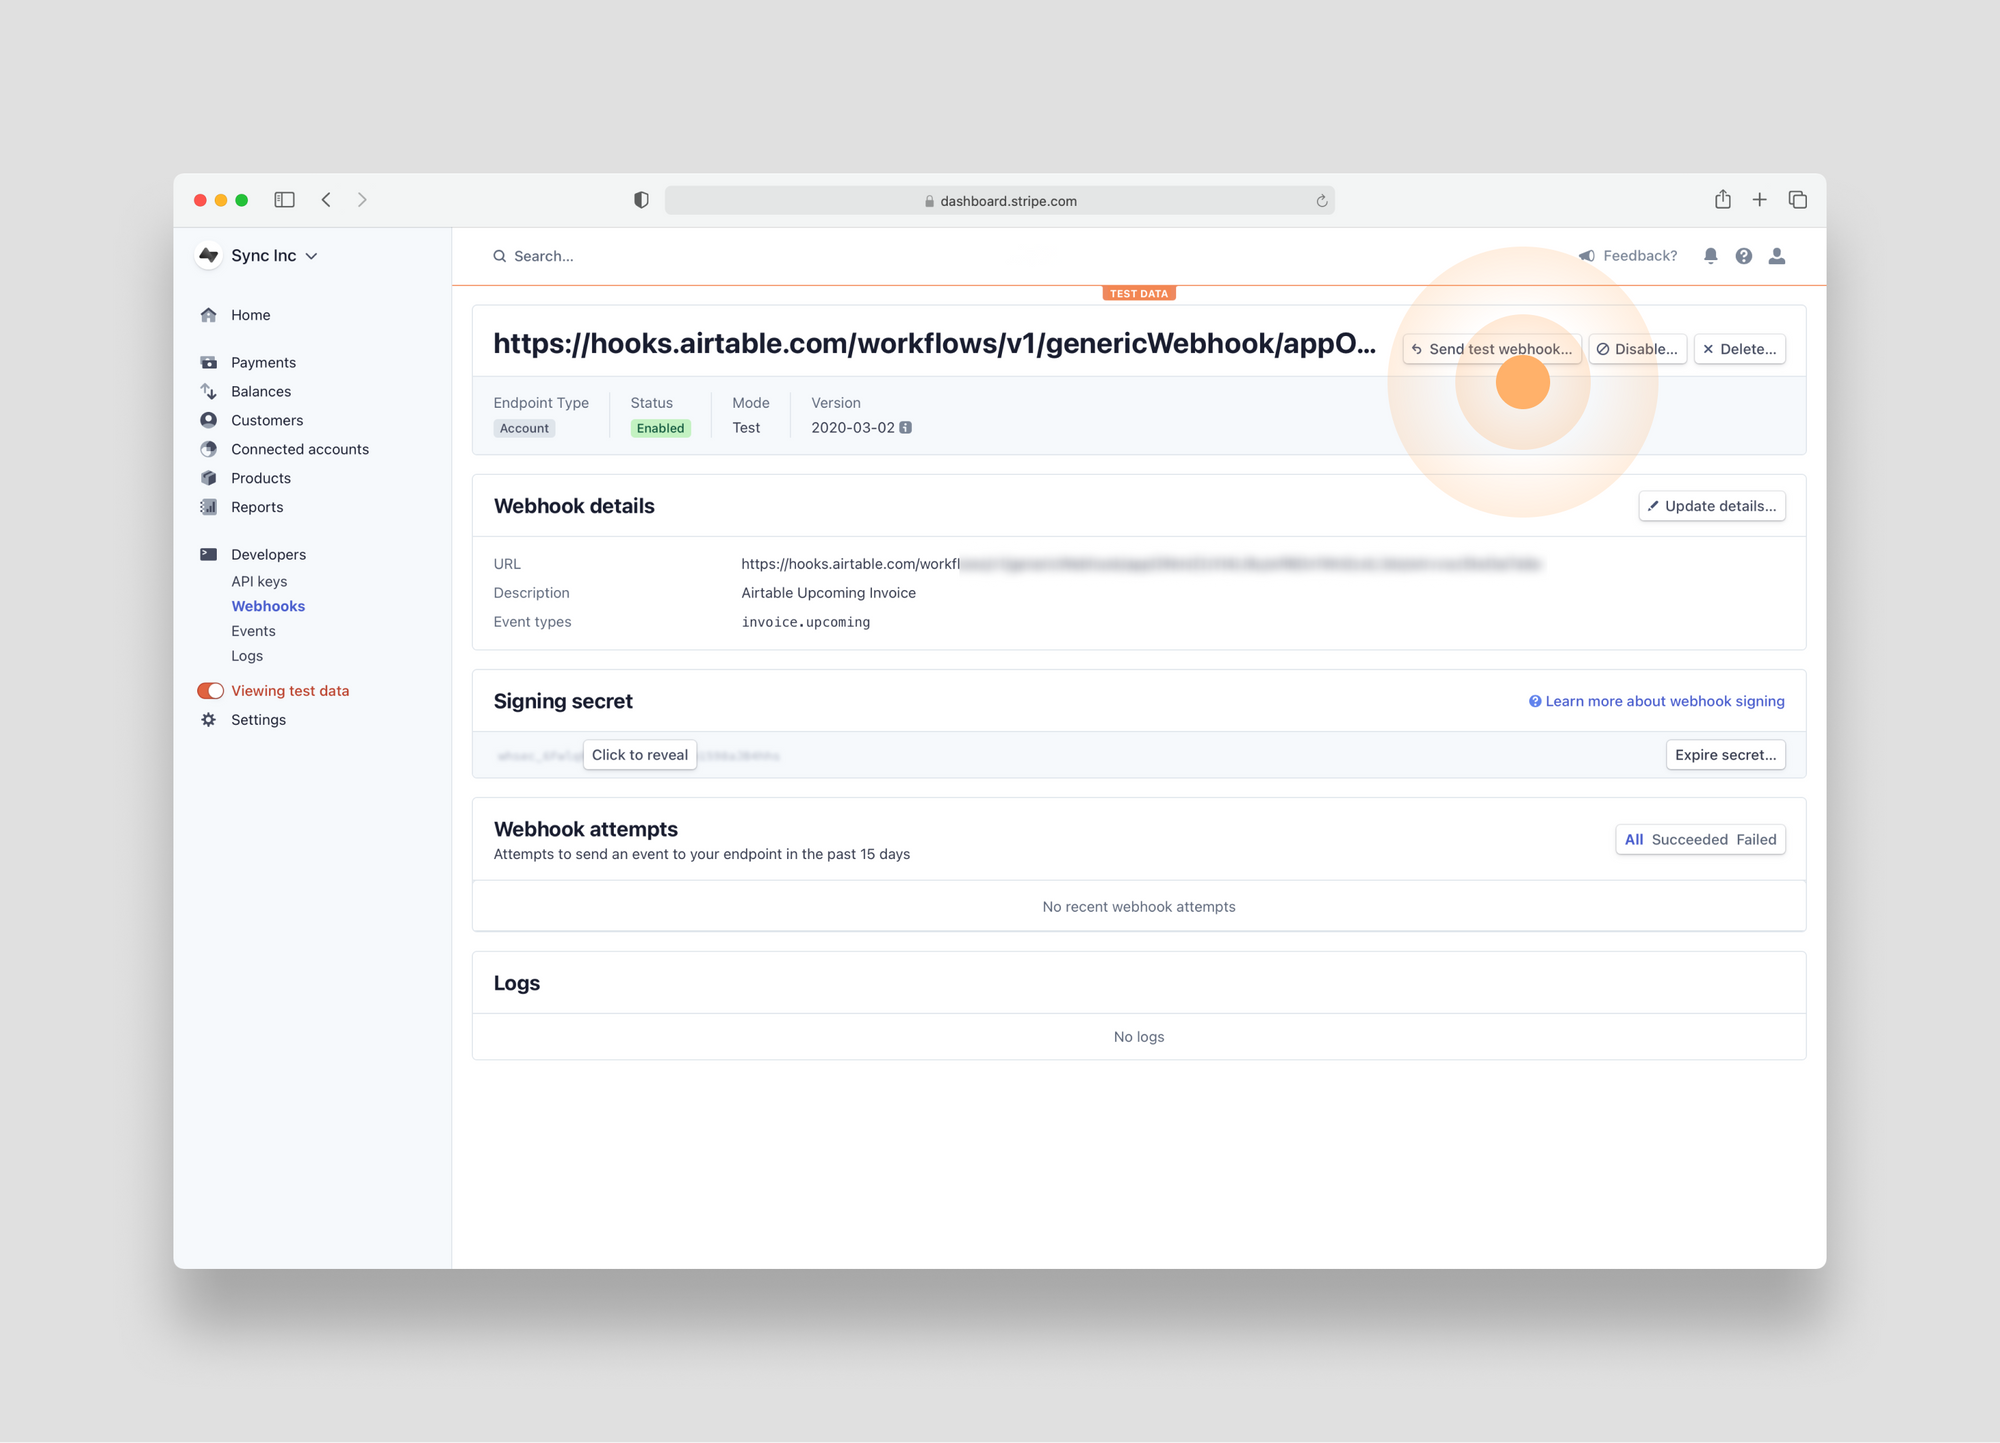
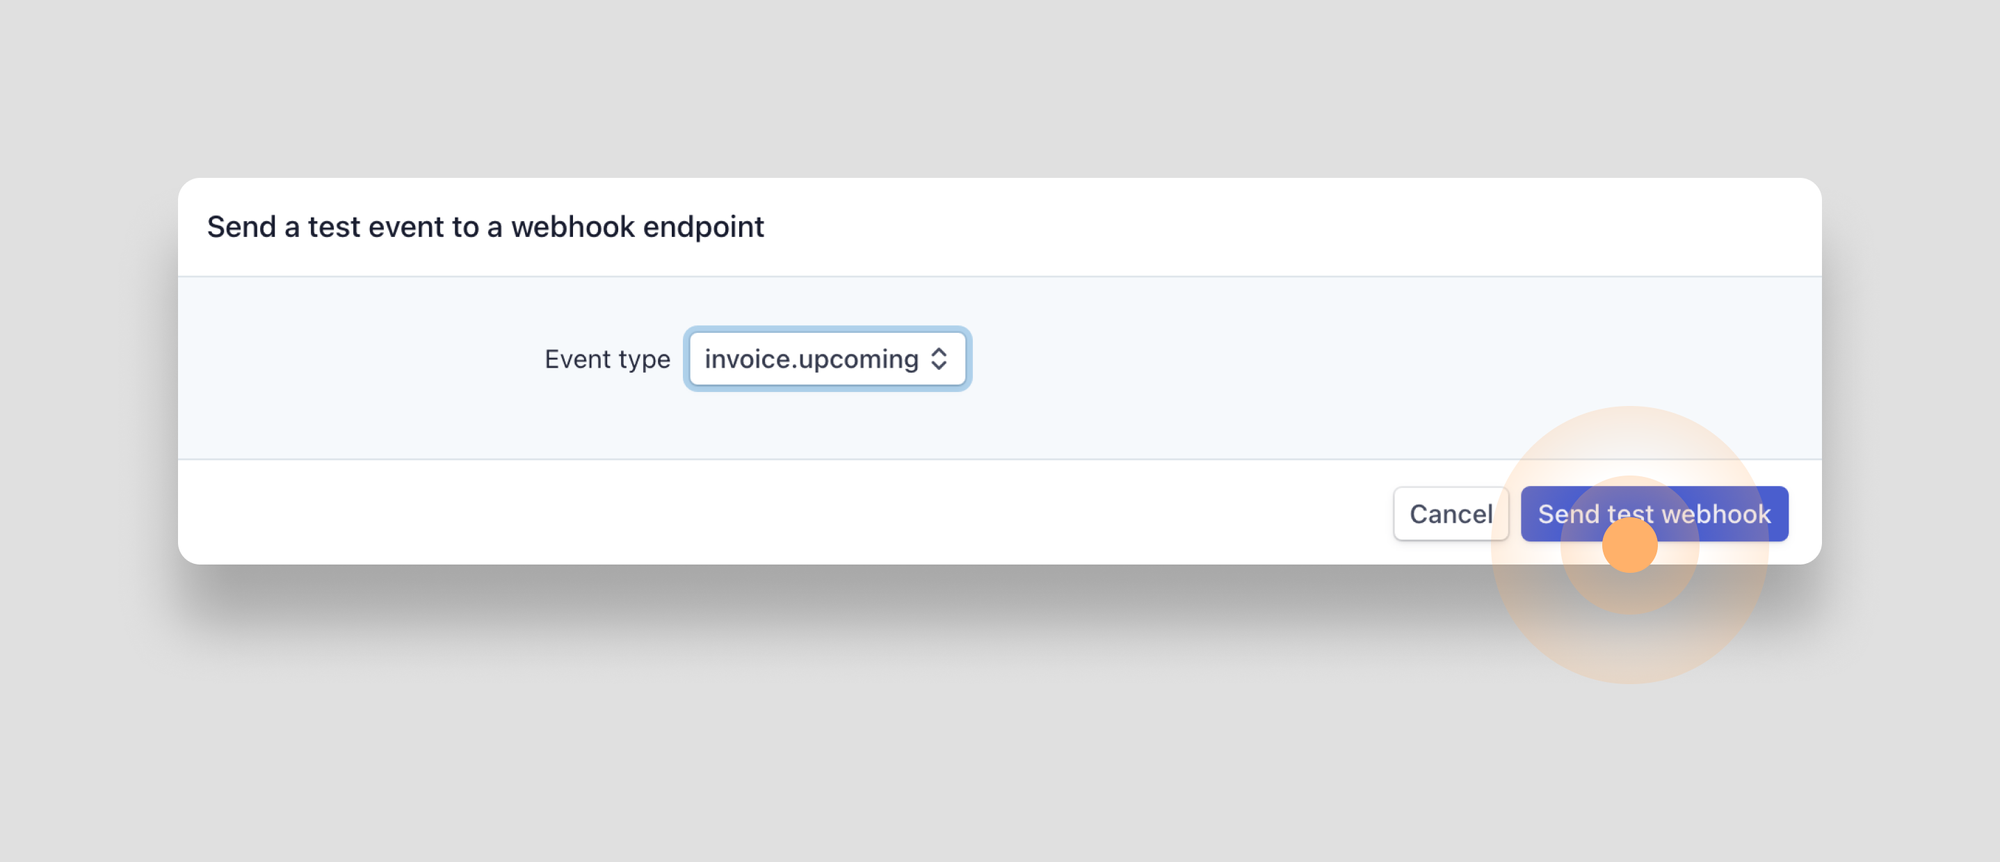
Stripe will create the new endpoint for you. As mentioned earlier, you first need to send a test webhook to Airtable in order to build out your automation. To do so click the Send test webhook... button:
In the modal that appears, select the invoice.upcoming event and then click the Send test webhook button:
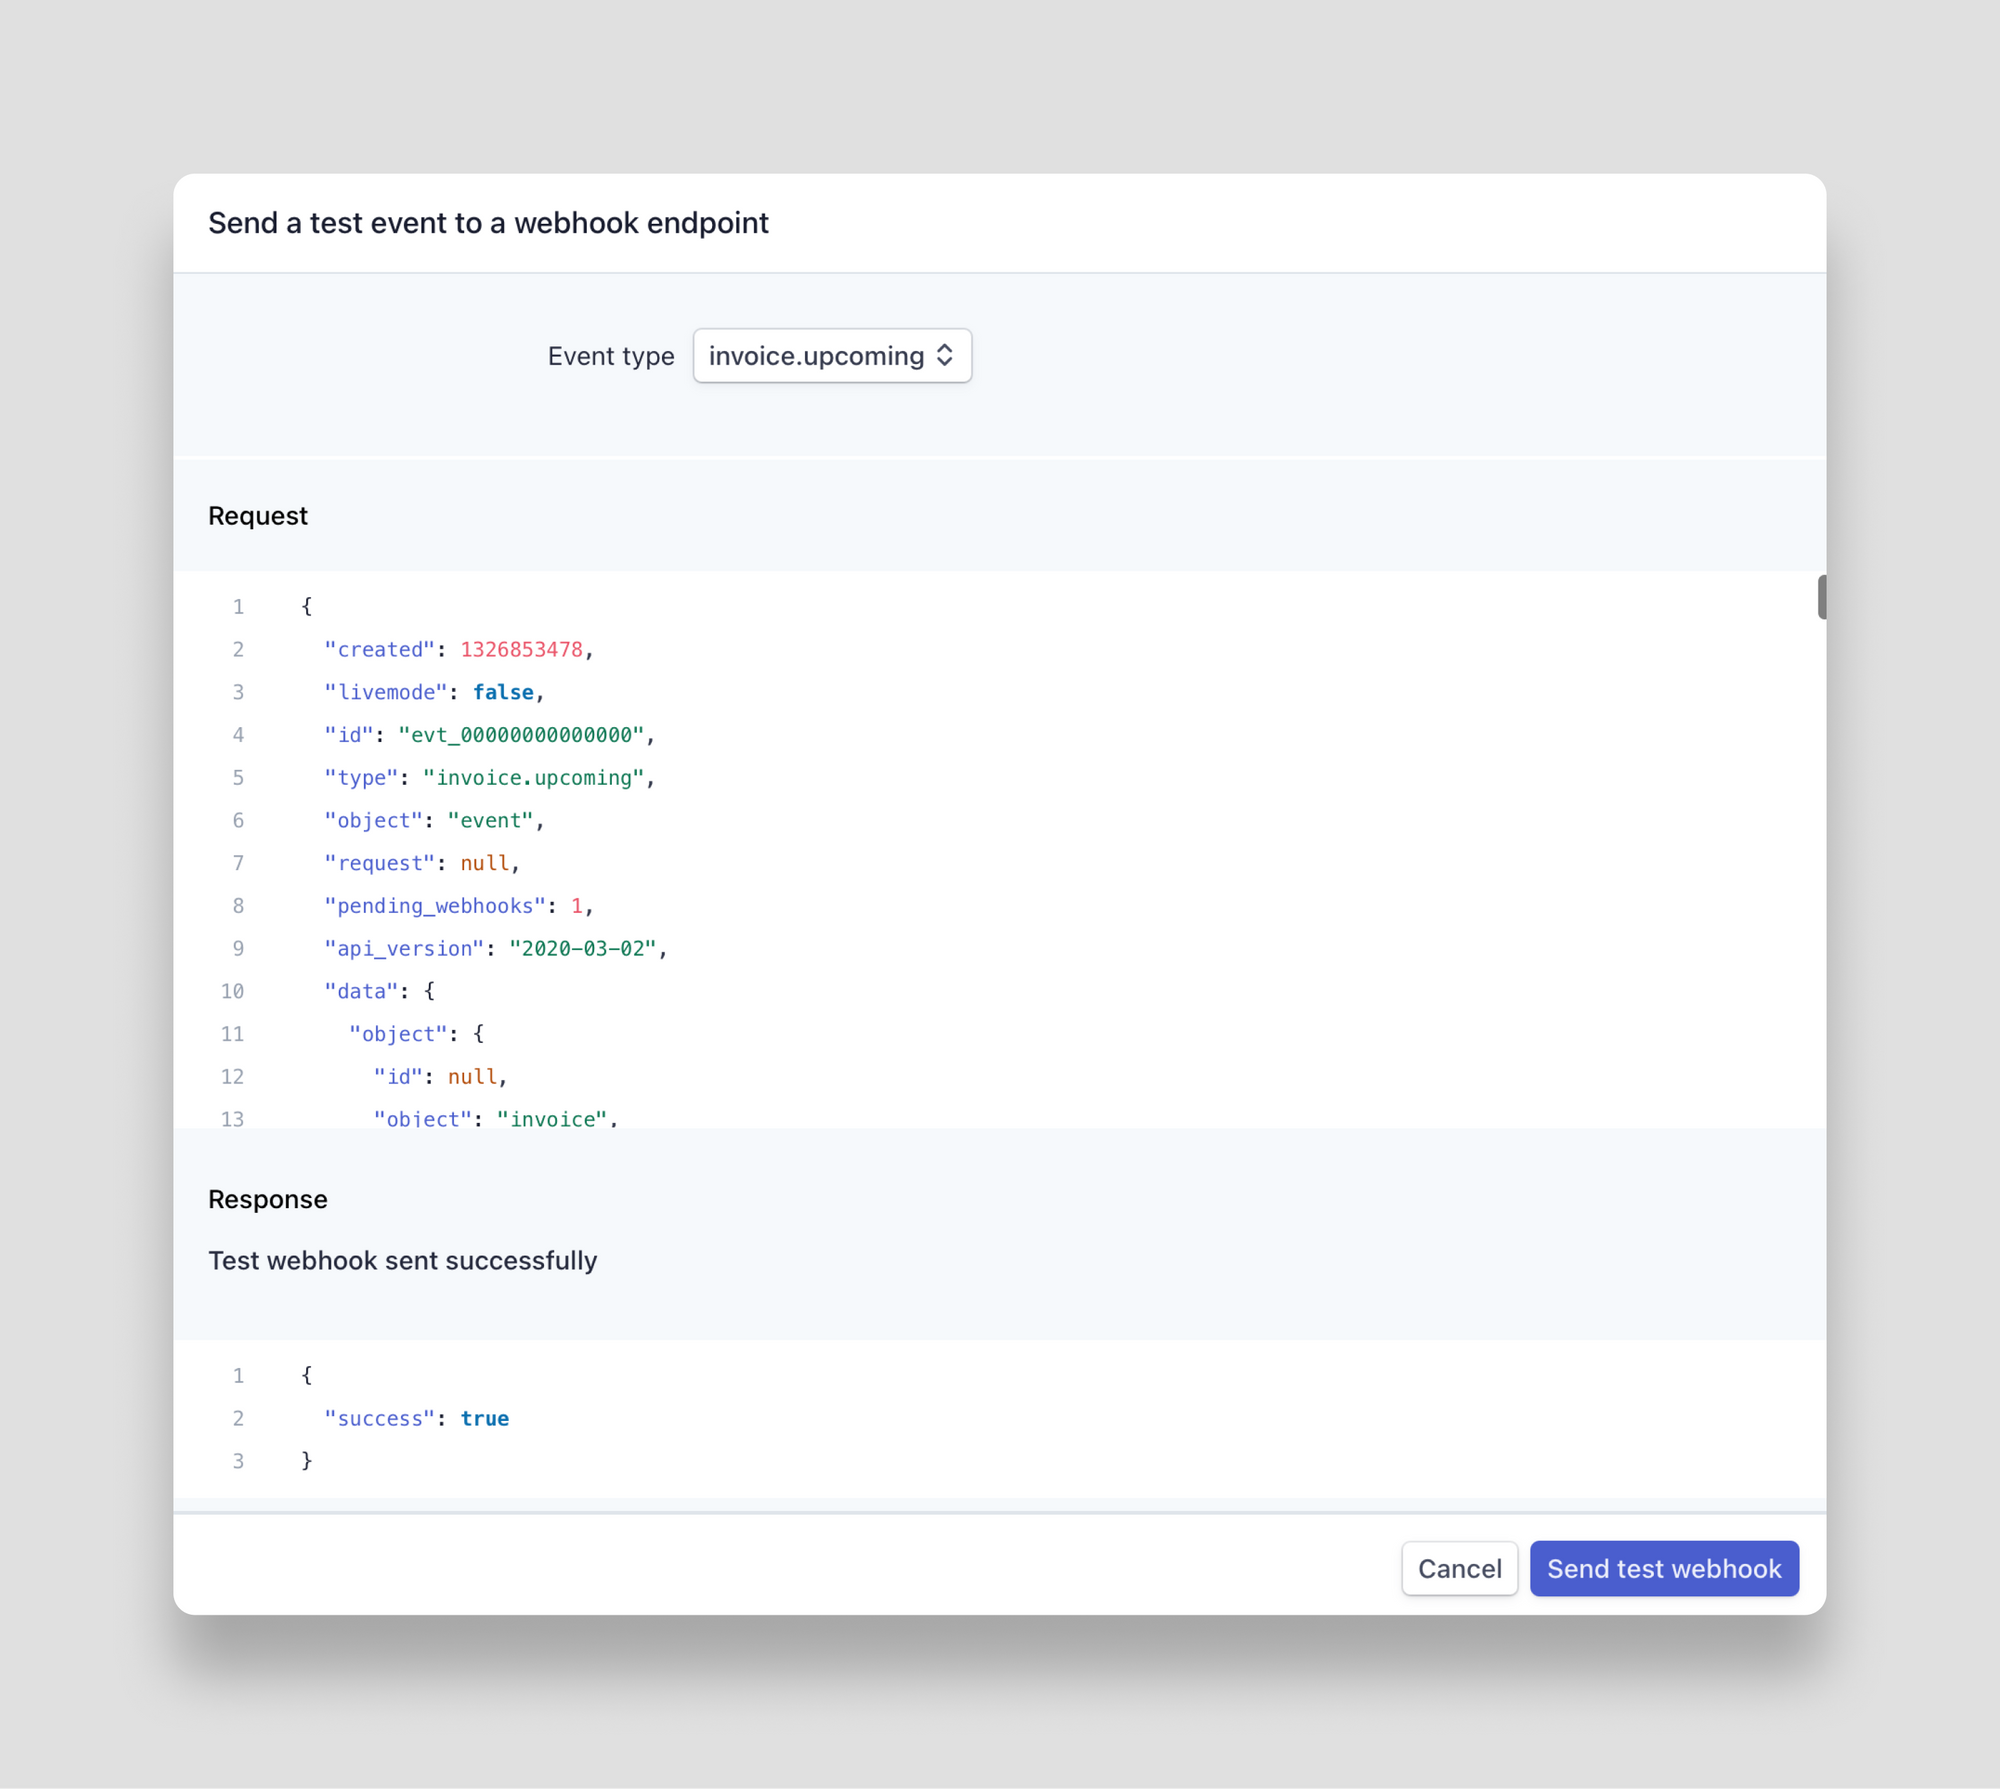
Stripe will now send a test webhook to Airtable. You'll see the payload that was sent, and (if everything worked correctly) a "success": true in the response:
Now that you have sent the test webhook from Stripe to Airtable, head back to Airtable to complete the test of the webhook.
To do so, click the Run test button in your automation. Airtable will verify the webhook and then present you with the data payload:
Build your automation
Now that Airtable has validated the webhook trigger, you can build the rest of your automation by adding actions.
You could build a custom script that takes in the payload from the webhook as inputs. But for this use case, we'll just use the no-code "Create record" action.
But before we add the action, set up the Airtable base to properly store the contents of the webhook. I find it's helpful to do this after you've tested the webhook so that you can see the structure of the data you're working with.
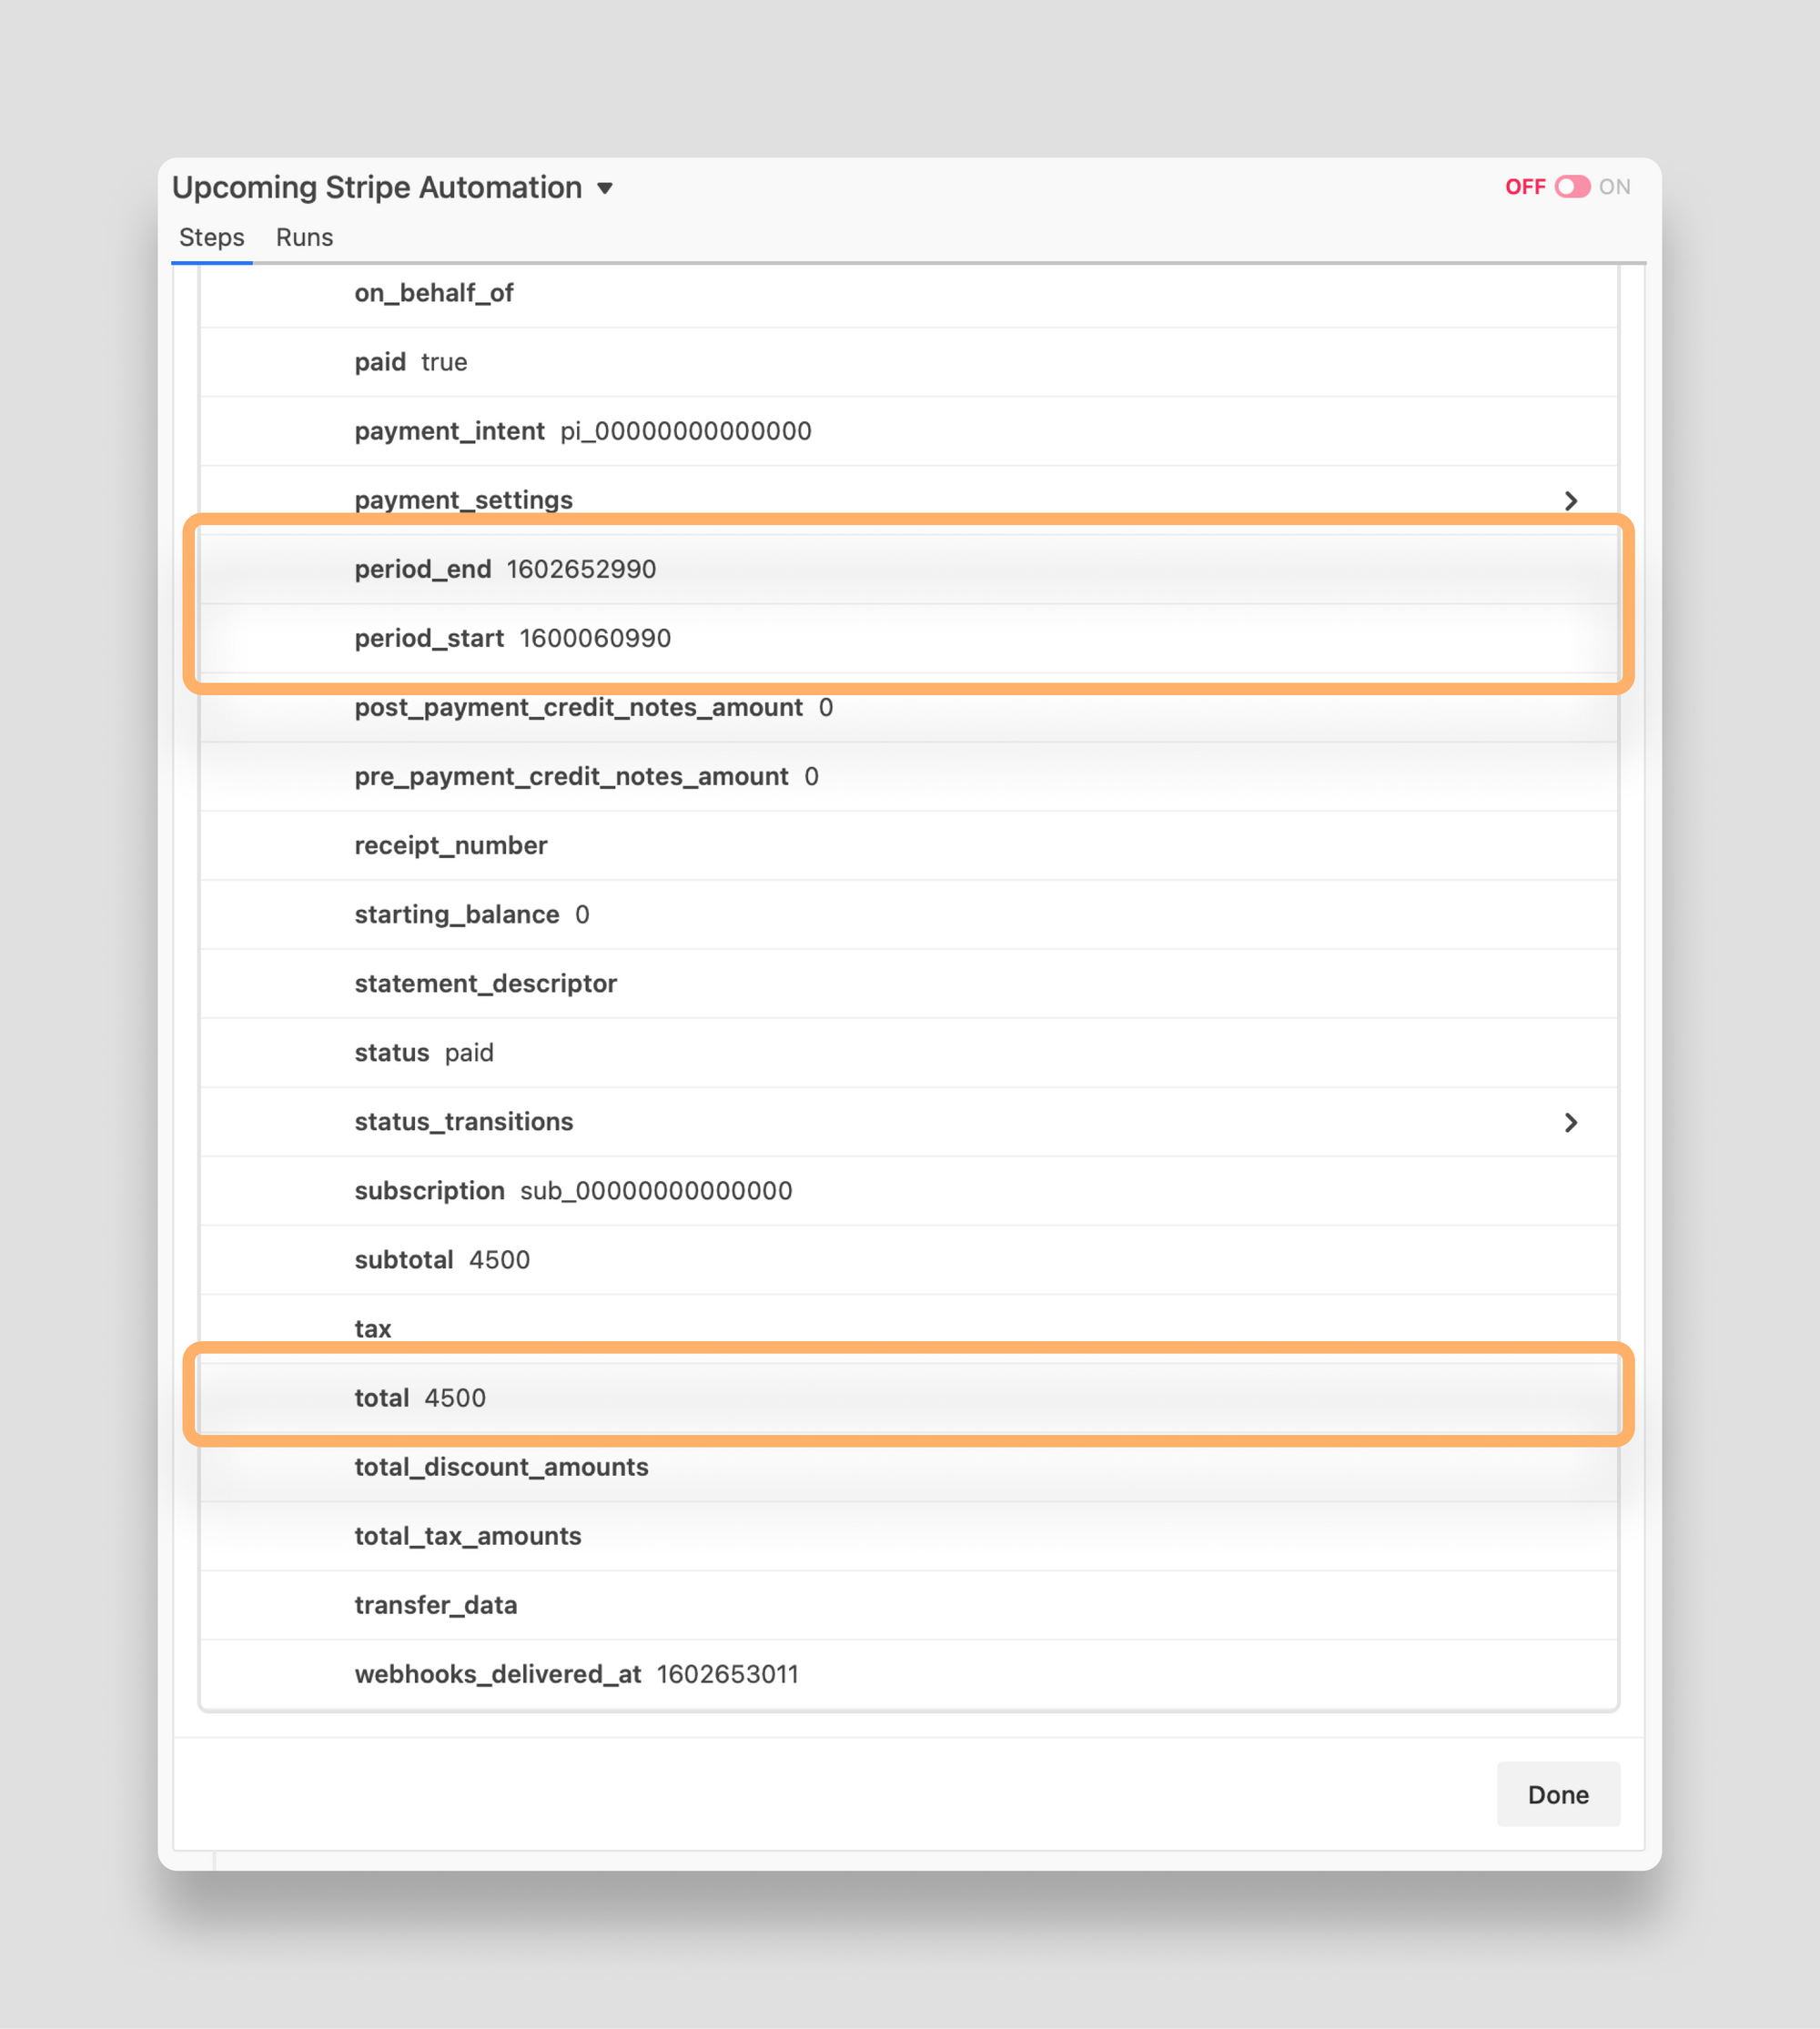
For instance, you can see that the Stripe webhook will deliver the data with currency formatted as cents and time formatted as a Unix timestamp:
As a result, it's best we store these values as integers in the Airtable base and then use formulas to make them more friendly to users. Taken together, this is one way you could configure your Airtable base to take in the data from this webhook:
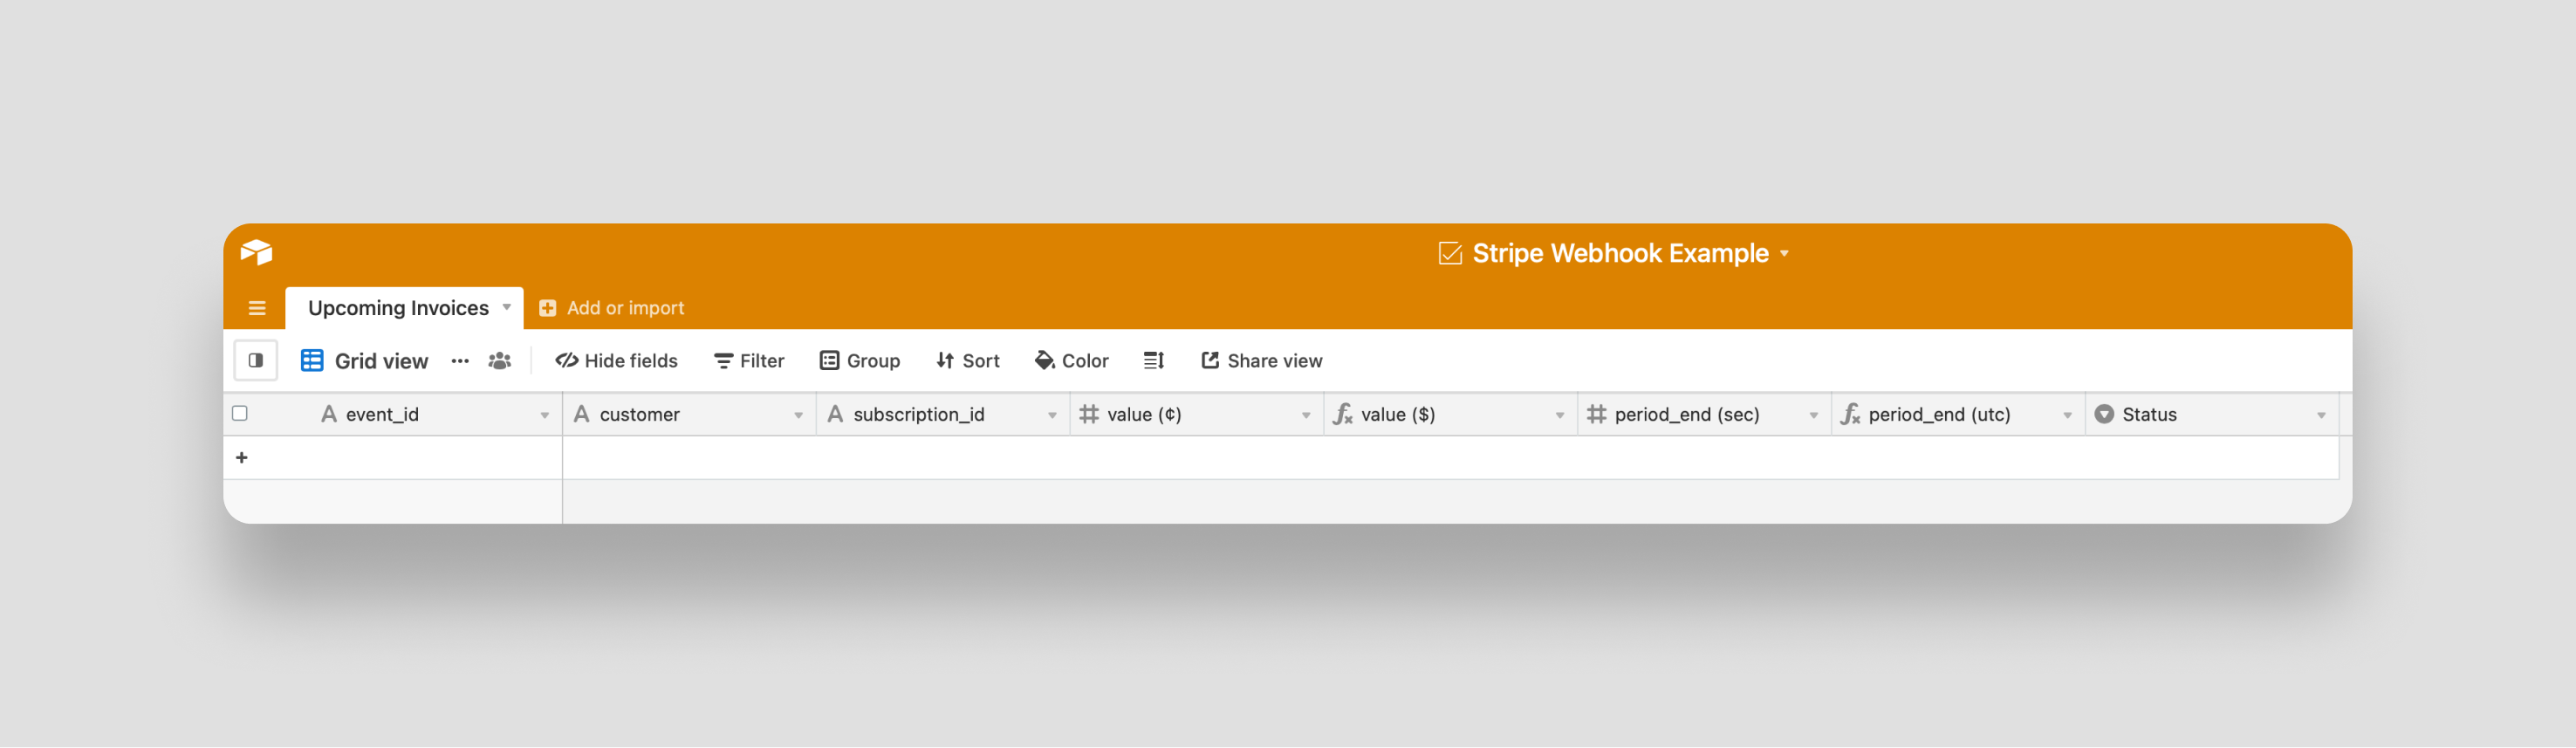
Here, you plan to record the event_id from the webhook as the primary key in the table. Then you store data from the webhook in additional columns. Last, you store the status of each upcoming invoice so your accounting team can track their workflow.
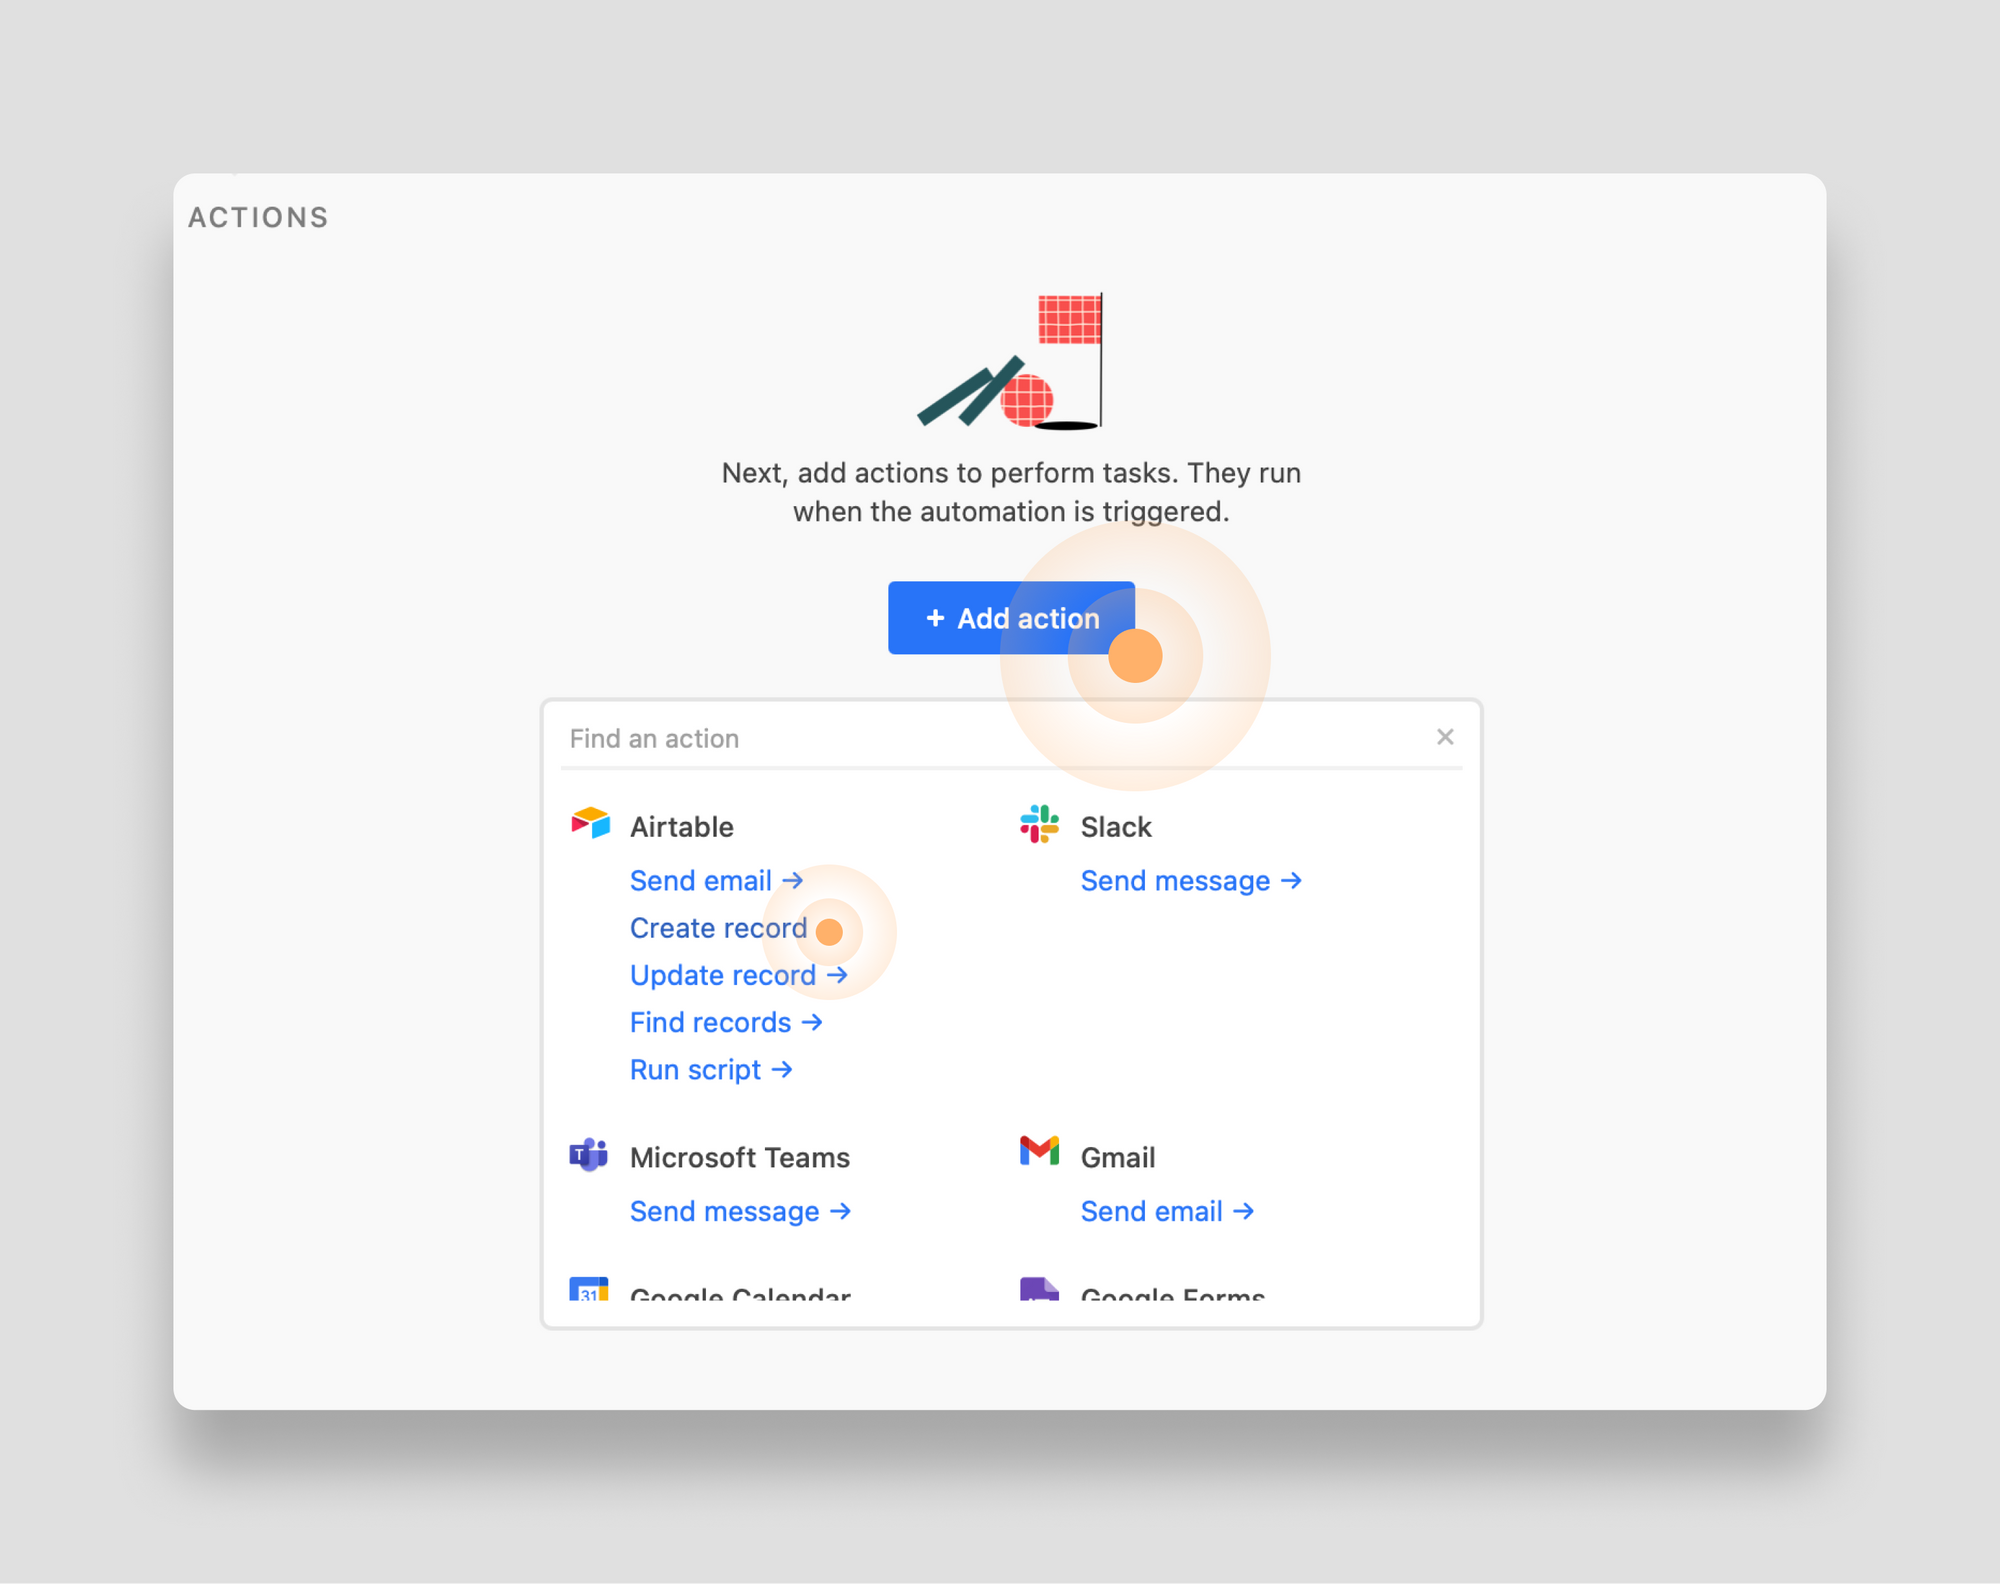
With your table set up, you can now easily configure the action step of your automation to create a new record. Click the blue Add action button and select Create Record:
Now map the values in the webhook payload to the fields in your table. It just takes some clicking:
Once you've mapped all the fields, test your automation by clicking the Run test button:
Voila - your automation works!
Turn your automation on
To finish your webhook automation, there are two more steps.
First, you'll recall that the webhook endpoint you created in Stripe is using test data. Now that you've confirmed everything is working, go back to Stripe and flip the switch so you are now working with real Stripe data. Then create a new webhook endpoint that points to your Airtable webhook trigger.
Note: Stripe is a bit unique in that it offers "test" webhooks. Most platforms require you to work with real data from the start.
Second, turn your Airtable automation on:
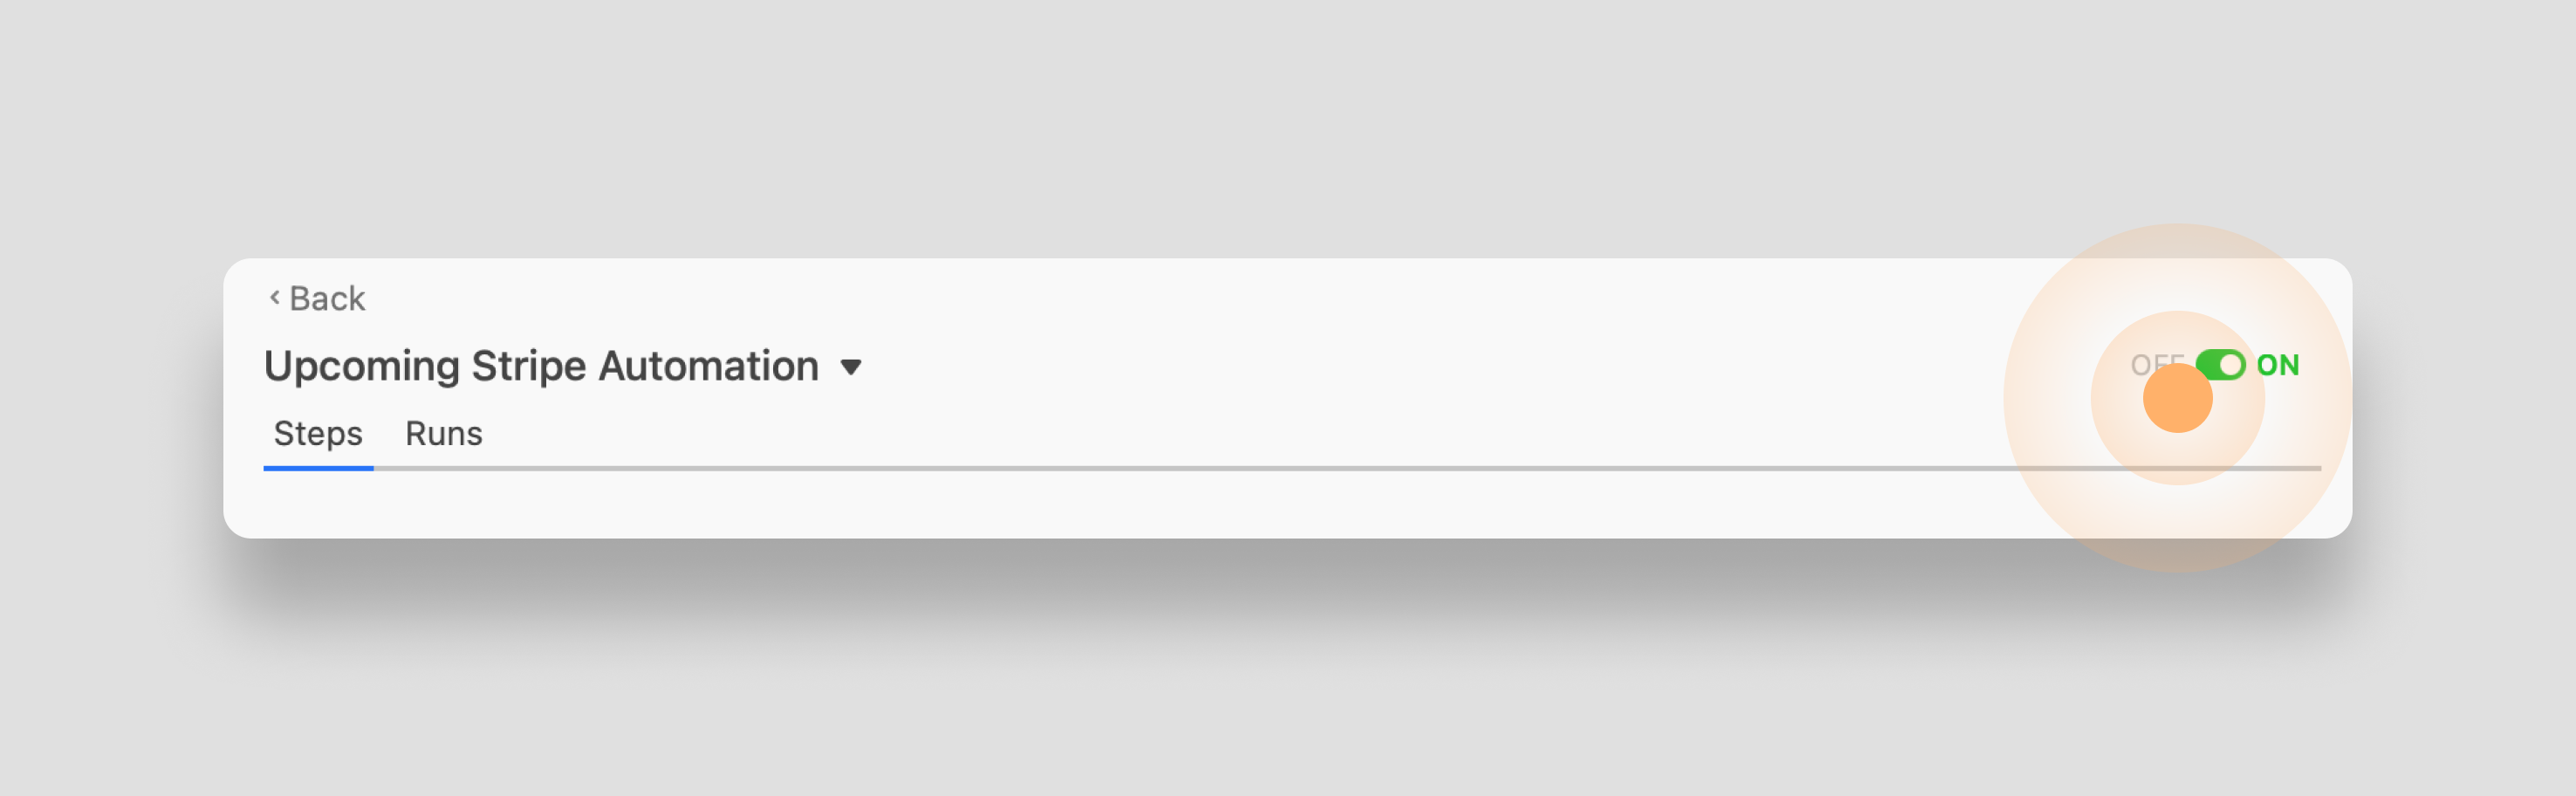
You've completed all the steps: You created a webhook trigger in Airtable, configured Stripe to send events to that webhook, tested the integration end to end, added an action to create a new record, and turned everything on.
Now, whenever a new upcoming invoice event fires, your accounting team will see it appear in Airtable automatically.
If ever there is an error, Airtable will alert you with an email. So far, we've been running our operations at Sequin on an Airtable base populated with Stripe webhooks for a month with no errors on either end.
Conclusion
For developers, the addition of inbound webhooks to trigger automations is a nice upgrade to the Airtable tool stack. Yes, you could do this with low-code tools like Zapier - but now having this raw capability in Airtable alongside Airtable scripts makes the platform even more programmable.